Wednesday, July 23, 2014

TextPad editor installation

TextPad is an editor which will help us in writing Java Programs and execute them from the editor itself, i.e. instead of executing the java program from command line. Below, I will explain from where we've to download the TextPad and how to install it.

1. Go to  http://www.textpad.com/download/ page
2. Choose the English User interface and click on 'Download' link as shown below (Install 32-bit if you have 32 bit machine or Install 64-bit if you have 64 bit machine):


3. Right click on the downloaded Zip file and unzip it (I use WinRAR software to unzip Zip files) as shown below:


4. Open the unzipped folder and double click on the Setup file to install the software as shown below:


5. Ensure that you are able to launch the TextPad application without any problems after its installation as shown below:


Tuesday, July 22, 2014

First Simple Java Program

I will write down the simple java program first and will explain each and every line of this program followed by it.

First Simple Java Program


/*  
    This is a simple Java Program.
    Call this file 'Example.java'
*/

class Example
{

      // Your program begins with a call to main() method.

      public static void main(String args[])
      {
        
             System.out.println("This is a simple java program");

       }

}


Output of the above program is: This is a simple java program


Step by Step explanation of the above program:


The program beings with the following lines.

   /* 
         This is a simple Java Program.
         Call this file 'Example.java'
   */ 

This is a multiline comment which starts with /* and ends with */. All the lines between /* and */ will be treated as comments and wont be executed by JVM. This syntax is mainly used if there are more than one lines of comments.

   class Example
   {
        
    }

We can clearly understand from the code that we have created a class named Example. In Java, all the code must reside inside a class by writing the code inside the braces i.e. { and } of the class.

Note - The name of the class should match the name of the file that holds this program. In this example, the name of the class is Example , so while saving this program having the class Name as Example, we've to save the program file as Example.java. If we save the program file with a different name then your program wont execute. And also observe that if the class name is Example and you are going to save the program file as example.java, the program wont run as the class name and program file name wont match in case.

    // Your program begins with a call to main() method

This is a single line comment that starts with // and ends at the end of the line. JVM wont execute the single line comments.

   public static void main(String args[])
   {

    }

This is the line at which the program will begin execution. All the Java applications will begin execution by calling main() method. There can be more than one method inside a class but the program execution starts from main() method only. The main method may further call the other methods in the class for execution.

Also we've to understand the usage of public, static, void and String args[] terms in this simple program.

  • public - This means we've specified the main( ) method as public method. All the members of the class (i.e. methods and instance variables) which are preceded by public access specifier can be accessed by code outside the class. In this example main( ) method is preceded by public access specifier, hence it can be accessed by the code outside the main( ) method. We've to always use public access specifier before the main( ) method, because the main( ) method should always be accessed from outside the class by Java Virtual Machine (JVM).
  • static - In order to call any method from outside the class, we've to create an instance (creating object) for the  class in which the method is available. We have to create an instance where ever we want to use this method. But by specifying static keyword before any method, we can use the methods outside the class without creating any instances (i.e. without creating objects for the class in which the method is available). Since main( ) method  is called by the JVM before any objects are created, we've to specify static keyword in order to use the main() method.
  •  void - Using methods we can return values. For example there is a method called addition method which contains the code to add two numbers. When ever this method is called, the addition method can return sum of the two given numbers. The returned sum can be used by the method which called the addition method. But by specifying the void keyword before any methods, we are telling the compiler that this method is not going to return any values. Since we're specifying the void keyword before the main() method in the above simple program, we're telling the compiler that this main( ) method is not going to return any values.
  • main(String args []) - All the methods receives the information from outside the method, by using the variables (also called as parameters) which are specified within the set of parenthesis(i.e. (  ) )that follow the name of the method. Here in the above simple program, we've give the parameter as args[] and we've declared it as String typeargs[] parameter receives any command line arguments present when the program is executed. But this simple program is not making use of String args[], we'll discuss more on this topic in the future posts. So when ever we write the main method, we've to compulsorily use the args[] parameter by declaring it as a String irrespective of whether the main() method will use it or not. For the other methods, when there is noting to be received by the methods, we can keep the braces empty i.e. addition( ). i.e. addition( ) method wont receive any information from outside the method as the braces followed by the method name addition don't have any parameters. 
All the code related to the main() method should be written inside the braces { and } of the main( ) method. The same applies to the other normal methods.


    System.out.println("This is a simple Java program.");


This line of code is written inside the main( ) method in the above simple program. This line prints  This is a simple Java program. output on execution.

We've to understand the 'println( )', 'System' and 'out' terms to understand how this line prints the This is a simple Java program text as output.

  • println( ) - This is a built-in method of Java. i.e. Writing any separate code for this method is not requried, as this is built-in method which is readily available in Java. In this case println( ) method  will display the text that is passed to it under " " as output.
  • System - This is a predefined class of Java that provide access to the system on which the output needs to be displayed. 
  • out - is the output stream that is connected to the console.

Also you may notice that the above line ends with a semicolon ; . All the statements in Java end with a semicolon. All the other lines in the above simple program which don't end with the semicolon are
not statements.

Monday, July 21, 2014

Install Java JDK and Configure

Eclipse IDE is required to develop Selenium Automation Scripts in Java programming language. But we cant run Eclipse IDE without having Java Development kit (JDK) installed in our machines. So we have to install Java JDK first as explained in the below steps:

1. Open http://www.oracle.com/technetwork/java/javase/downloads/index.html in any browser
2. Select 'Java Platform (JDK) category' to download Java JDK as shown below -


3. Select the 'License Agreement' as shown below:


4. Download the 32 bit version of Java JDK (i.e. Windows x86 in the below screen) if you have 32 bit machine else if you have 64 bit machine install 64 bit version of Java JDK  (i.e. Windows x64 in the below screen) -


5. Install the downloaded JDK file and ensure that JDK and JRE folders got created at the C:\Program Files (x86)\Java folder path for 32 bit machine (But for 64 bit machine they will get created at the C:\Program Files\Java folder)


Configuring the Java JDK:

Follow the below steps to configure the Java JDK:

We have to configure the Java by configuring the build path.

If you want to save the created java files outside the bin folder then you have to set path of JDK. Path is required for using Javac and Java tools. Javac tool compiles the Java code and Java tool will run the code.

How to set path of JDK will be explained below:

1. Click on 'My Computer' icon on your desktop as shown below - 


2. When your drives are displayed in your My Computer window, right click any where inside the window and select 'Properties' option as shown below -


3. Click on 'Advanced System Settings' option as shown below:


4. Click on 'Environment Variables Button as shown below:


5. Click on 'New' button under the User variables as shown below:


6. Type 'path' into the 'Variable Name' as shown below:


7.  In 32 bit machines -> Go to C:\Program Files (x86)\Java\jdk[Version]\bin folder and copy the path of the bin folder as shown below (But in 64 bit machines -> You need to go to C:\Program Files\Java\jdk[Version]\bin folder )


8. Paste path of the bin folder in Variable Value field as shown below and click on 'OK' button


9. Ensure that the path is added under the User variables and Click on 'OK' button as shown below to finish the process


Check whether the Installed and configured Java works:

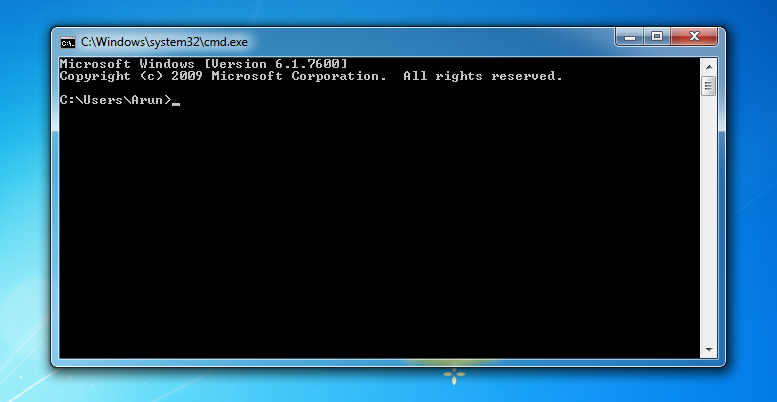
1. Open Windows Command line as shown below:


2. Type the command java -version in the Command line window as shown below and press 'Enter' key on your keyboard as shown below:


3. Ensure that the Java version we've installed and configured is displayed on executing the command specified in step 2 as shown below:


If you see the version of Java that is installed as shown in the above screenshot, it means that your Java is working.

Now you are ready to compile and run any java program.


Notes - 

1. You can also install JRE (Java Run Time Environment) instead of JDK (Java Development Kit). You can use Eclipse IDE and develop automation scripts when you install JRE instead of JDK prior to installing Eclipse IDE as Eclipse IDE contains its own features for developing and compiling Java.

2. If you want to Run Java Programs using any other editors instead of Eclipse IDE, then installation of Java JDK is must as the editors wont have  features to develop and compile Java programs. So installing JRE prior to running Java programs on any other editors instead of Eclipse IDE wont work. JDK is must in this case.

3. When you are running your automation scripts developed using Java programming language on Eclipse IDE, you can simply install JRE instead of JDK if you want to save your computers memory. JRE installation take less time and less memory to store

How to use Firepath?

Pre-requisite - Install Firepath Firefox Add-on as explained in the previous post.

We use Firepath to find out the XPath or CSS Locators of the required elements. (Locators are generally used to locate the UI elements on the Application while running Automation scripts. Locators concept will be explained later. XPath and CSS Locators concept will also be explained in the later posts). So lets find out the Xpath Locator followed by CSS Selector Locator using Firepath below:

Finding out the 'Xpath' value of the inspected UI element using Firepath 

1. Launch Firefox and navigate to any site say www.google.com
2. Click on the FireBug icon on the top right side of the page as shown below:


3. Ensure that FireBug interface along with 'FirePath' tab  is displayed on the bottom of the page as shown below:


4. Click on the 'Inspect Element' FireBug option and select any UI element say 'Google Logo' as shown below:


5. Click on the 'Firepath' tab to find out the Xpath  value of the inspected element (i.e. Google Logo in this example) as shown below:


6. Ensure that 'Xpath' property value of the selected UI element (i.e. Google Logo) is displayed by default as shown below:


7.  Copy the 'Xpath' propery value of the inspected element (How to use this Xpath value in Selenium Automation will be explained in the upcoming posts)

Finding out 'CSS' Selector value of the inspected UI element using Firepath:

1. Launch Firefox and navigate to any site say www.google.com
2. Click on the FireBug icon on the top right side of the page as shown below:


3. Ensure that FireBug interface along with 'FirePath' tab  is displayed on the bottom of the page as shown below:


4. Click on the Dropdown field as shown below and select 'CSS' 


5.  Click on the 'Inspect Element' firebug option and select any UI element say 'Google Logo' to inspect as shown below:


 6.  Ensure that 'CSS' property value of the inspected UI element (i.e. Google Logo) is displayed as shown below


7.  Copy the 'CSS' Selector property value of the inspected element (How to use this CSS value in Selenium Automation will be explained in the upcoming posts)